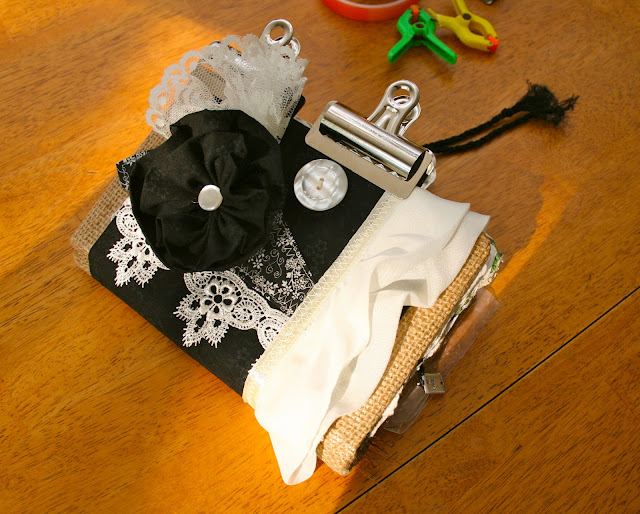
Completed cover for my altered book
I did a post on on this altered book a few weeks back but I didn't have the cover completed. Finally got some time to do that today.
I work on the floor a lot. I had a number of things I thought about using and didn't.
Here's what I learned doing this one today. Lay out what you think you want to use and place it on the cover where you think you want it before you started sewing or gluing anything. Take a picture when you finally get it the way you want it. That way you can do things in the correct order because it's layered. I forgot the order and did one layer too soon and it changed my final lay-out.
I use these clips a lot to hold things together while glue sets and dries.
I was happy with the finished journal.
This is another one I had shown in the last post about handmade journals. I had the cover made but not put on the chip board yet. I am using this as my budget book and needed it to be expandable. I have pocket in it for bank statements, bills, I made checkbook registers the size of the book and as well as ledger pages. The medallion on the cover has the serenity prayer on it.... fits with budgeting many months.
After doing a book put together with rings and an altered book I prefer the altered book in the end. Altered books are certainly more work but I like the finished product enough to do it that way again.
I am going to start on the family album next as an altered book. I am so excited to do that one with the amazing fabric and stones!
Elizabeth
Edited 9/4/12 -
I'm including a picture of the original book as I've gotten a number of questions about it. It was covered in burlap first and then the inner book was redone with new paper, pictures and embellishments that were meaningful to me. The last step was the cover.


Wow! Talk about talent! Those are beautiful - I love the pocket on the front. I would hate to even use them...
ReplyDeleteThank you so much! That's so sweet. I love doing them. It's my fun time. The pocket was from an old pair of jean shorts of Malia's.
ReplyDeleteHow beautiful! Wow you have incredible talent!
ReplyDeleteThanks Joyness!
ReplyDelete