This week I devoted my attention to my dogs. Last week was my tenant and next week will be goats.
I buy Coolero beds every year and they never last. They are suppose to be reusable so if your dog eats the cloth covering you can just replace the cover but my experience is that the screws lock up with rust from being outside and they have to be tossed when the cover is no longer any good.
A few months ago while trying to find an alternative for the Coolero beds I came across a video on You Tube made by the Columbus Dog Club showing how to make pvc dog beds. It looked so easy I decided to make some. I had some old shade material I hadn't used in a while and decided to use that for my cover so all I had to buy was the pvc, fittings and screws. I had dreaded sewing the covers and this appealed because it had no sewing involved. I don't mind sewing but the material the indoor outdoor beds are covered in is difficult for me.
This was so easy. Cut 1" pvc with hacksaw. 2 sides were cut at 35.5 and 2 sides were 25.5. The legs were 6". Put it all together and hammer it a bit to make sure the fittings are snug.

Lay it upside down on the cover material.
Screw it on. It did take two of us to screw it on. To keep it tight one screwed while the other one held it tight. The screws were the kind that had a washer like head to hold the material. I will probably double the shade cloth on the rest because dogs nails will go through it fairly quickly but they did with the Coolero too. I got a few done but want to make a few more.
The ones I bought cost about $35 each and these were about $12. And if you wanted to buy Coolero covers and make your own frames you could and it would still save about $12 ea. I buy about 10 cooleros a year....we have a lot of dogs, so this is worth it to me, and the pvc is reusable. The dogs really do use them, especially in spring and fall when the ground gets cooler. They are house dogs but in nice weather they stay out a lot more and when they are out they really do appreciate their beds.
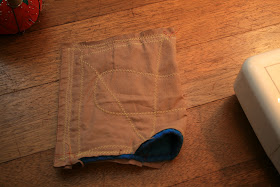
I also made them a bunch of dog toys. Malia had an old Dora blanket she wasn't using and we started using it for the dogs as bedding. Being dogs, it eventually got chewed up and pretty much full of holes. I took it and cut all the shredded parts off. Put the pieces that were still good on a sheet I had gotten at Goodwill for a couple of dollars. I pinned them together and then cut out the sheet with the blanket, and sewed them together. I zigzag stitched it all over for added strength and double zigzagged the seams. I put in 2 squeakers, added some poly fill and finished stitching them up.
Just need to turn it inside out, add the squeakers, fill and finish sewing up which sounds like a lot but it's about 10 min. maybe.
Normally I spend at least $100 on stuffed dog toys every summer. They tear them apart within hours leaving me with a mess of polyfill to pick up. The ones I made are still going strong and I mostly used repurposed things. The squeakers weren't expensive and the polyfill was about $5. and I have some left over. I didn't care what they looked like although they weren't bad looking. I could make the dogs do without to be really frugal but I think there's a happy medium. They love the toys and I feel good reusing things rather than spending money and buying more poorly made items that end up like badly made childrens things....in the yard broken for you to clean up. The quality is better and the cost is nominal. Win/Win.
Somebody help me remember the saying..... Use it up, wear it out or do without??? Is that it? I love it.
Elizabeth


Have you thought about sewing sleeves for the pvc pipe to slide thru for the dog beds? That way no screws would be required and easier to replace the covers if you don't glue the pvc pipes together.
ReplyDeleteI have thought about sewing them which is how the Cooleros are made but hate sewing that material. This actually took less time too. I didn't glue the pvc either. Just put 2 screws in each corner on the underside.
ReplyDeletePerhaps for the present time i’ll accept book-marking
ReplyDeleteand adding your Feed to my Google account. I enjoy brand-new updates and will share this website with my Facebook group.
Chat soon!
Feel free to surf to my page - education university